

Build a restaurant website with WordPress
A restaurant website has four jobs: show the food, prove the room is worth crossing town for, take a booking and tell people when you are open. This guide does all four, starting from an empty WordPress install and finishing with a site you can hand to a customer.
Step 1: Get WordPress ready
A restaurant site leans on three WordPress settings more than most, so set them before you touch the design.
- Site title and tagline. Settings, then General. The restaurant's name goes in the title and the food and the neighbourhood in the tagline. The browser tab, the search result and the card a guest forwards to friends are all built from those two lines.
- Permalinks. Settings, then Permalinks, then Post name. The menu page gets an address short enough to print on a table card or a flyer.
- Timezone. Back on the General screen, pick the restaurant's own city. Reservation requests are timestamped against it, and a wrong one files tonight's booking under tomorrow.
Everything else about preparing WordPress is the same for any Canvas site: the WordPress and PHP versions, a backup you have actually tested, and enough PHP memory for the photographs an import downloads. The import guide covers that once, for every project.
Requirements and backups before an import
A booking request is only worth something if the kitchen sees it before service. WordPress hands its mail to your server unless you tell it otherwise, and plenty of hosts drop that mail without a word. Set up an email delivery service or an SMTP plugin now and send yourself a test.
Step 2: Install Canvas and run the setup wizard
Upload the theme zip from your dashboard under Appearance, Themes, Add New, and activate it. The setup wizard opens by itself, and for this project it is quick work.
- Licence first. Paste the key from your dashboard. It is what lets the wizard download the restaurant package in the next step.
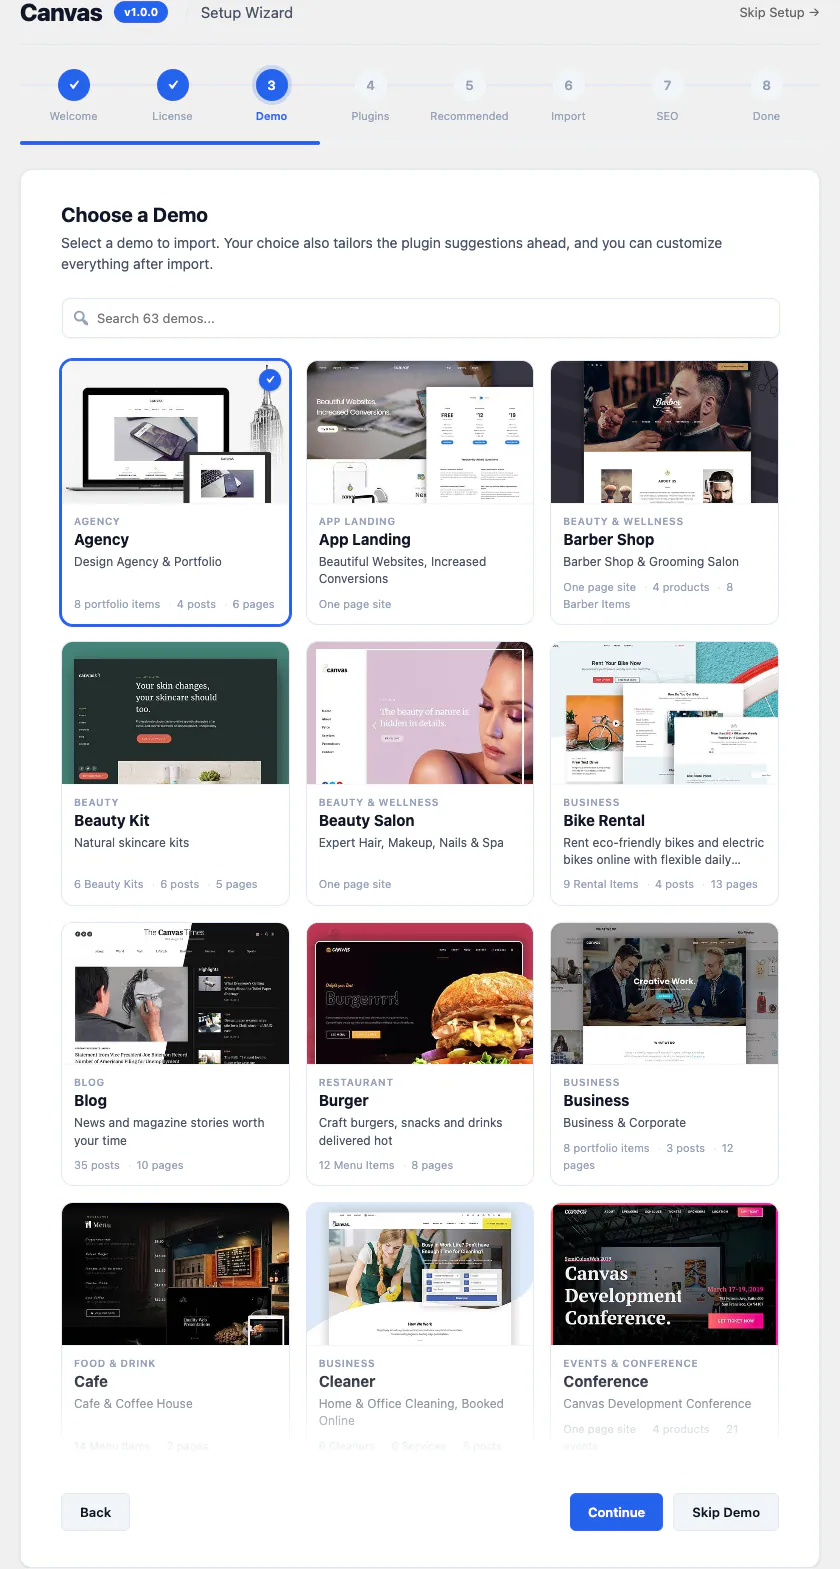
- Search for Italian Restaurant at the demo step. Its card lists the pages, the posts and the dishes it brings before you commit.
- Let the plugins step skip itself. The restaurant design needs nothing beyond Canvas and the companion plugin the wizard installs for you.
Close the wizard halfway and it waits under the Canvas menu until you come back.
Step 3: Import the restaurant demo
Open the live preview of the Italian Restaurant demo before you import it, and click through to the menu and the reservation page. The preview runs on the same theme you are installing, so what works there will work for you.
Site-wide, on a new site
On an empty install, import site-wide. The restaurant's fonts, colours, Theme Options and menus become your site's, so the private dining page you add next winter still looks like it belongs. Importing into a site that is already running is the other choice, and the import guide explains when it fits.
What arrives
- 6 pages, from the home page to the menu, the story and the contact page
- 6 blog posts with their categories, so the news section is not empty on day one
- 50 dishes, each one a Menu Item record of its own
- A slider, a working reservation form and 2 navigation menus assigned to their locations
- Header, footer and page title designs, each one an editable record
- The food photography, copied into your own media library
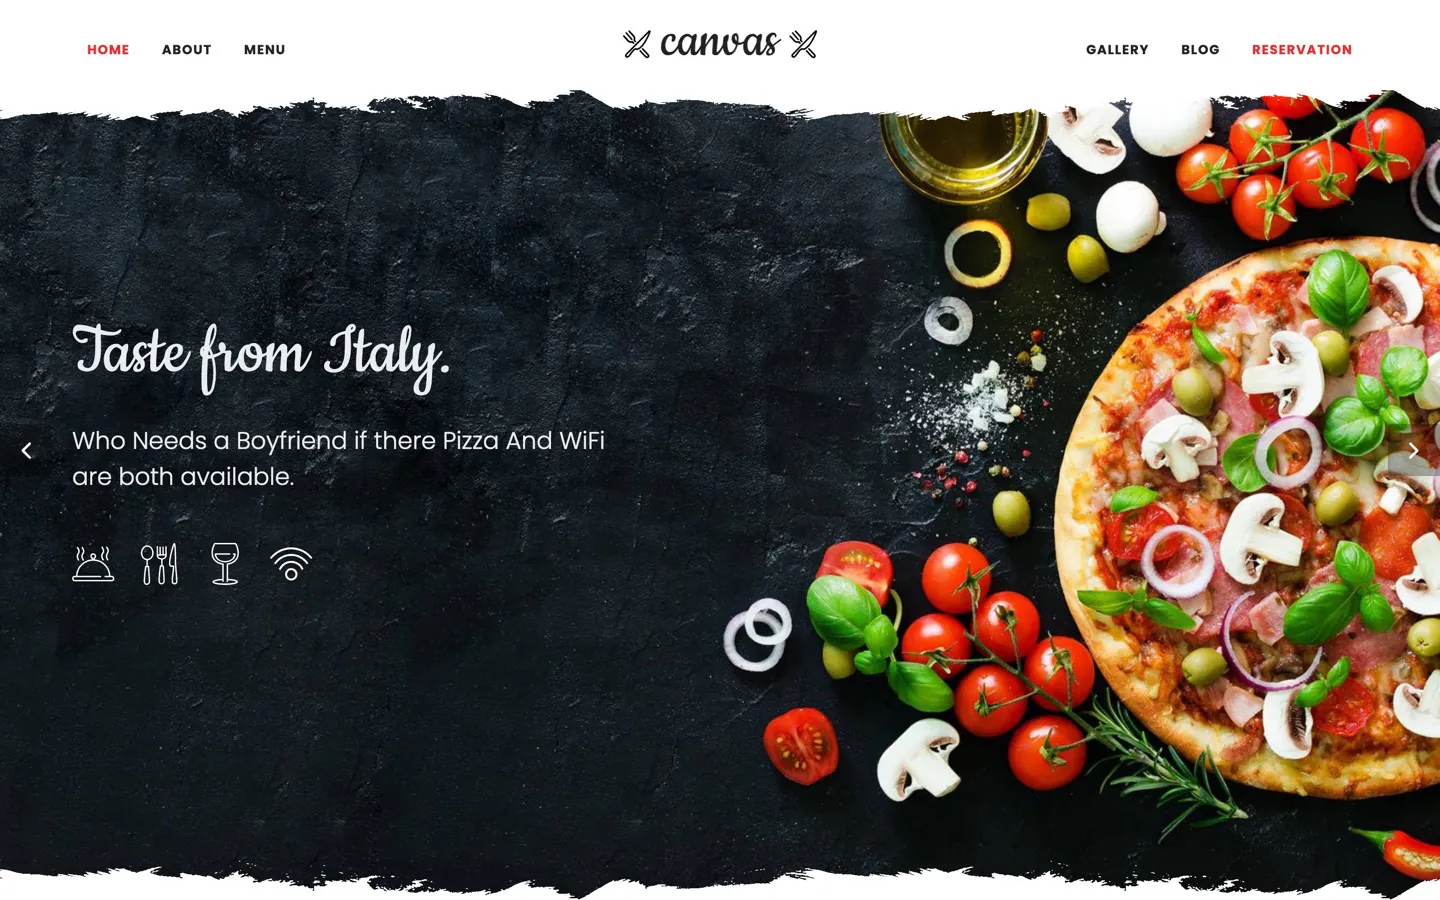
If the dining room in the photographs is nothing like yours, roll the import back from Canvas, then Demo Import, and try one of the other restaurant demos. Your previous settings come back with it.
Step 4: Replace the demo words and pictures
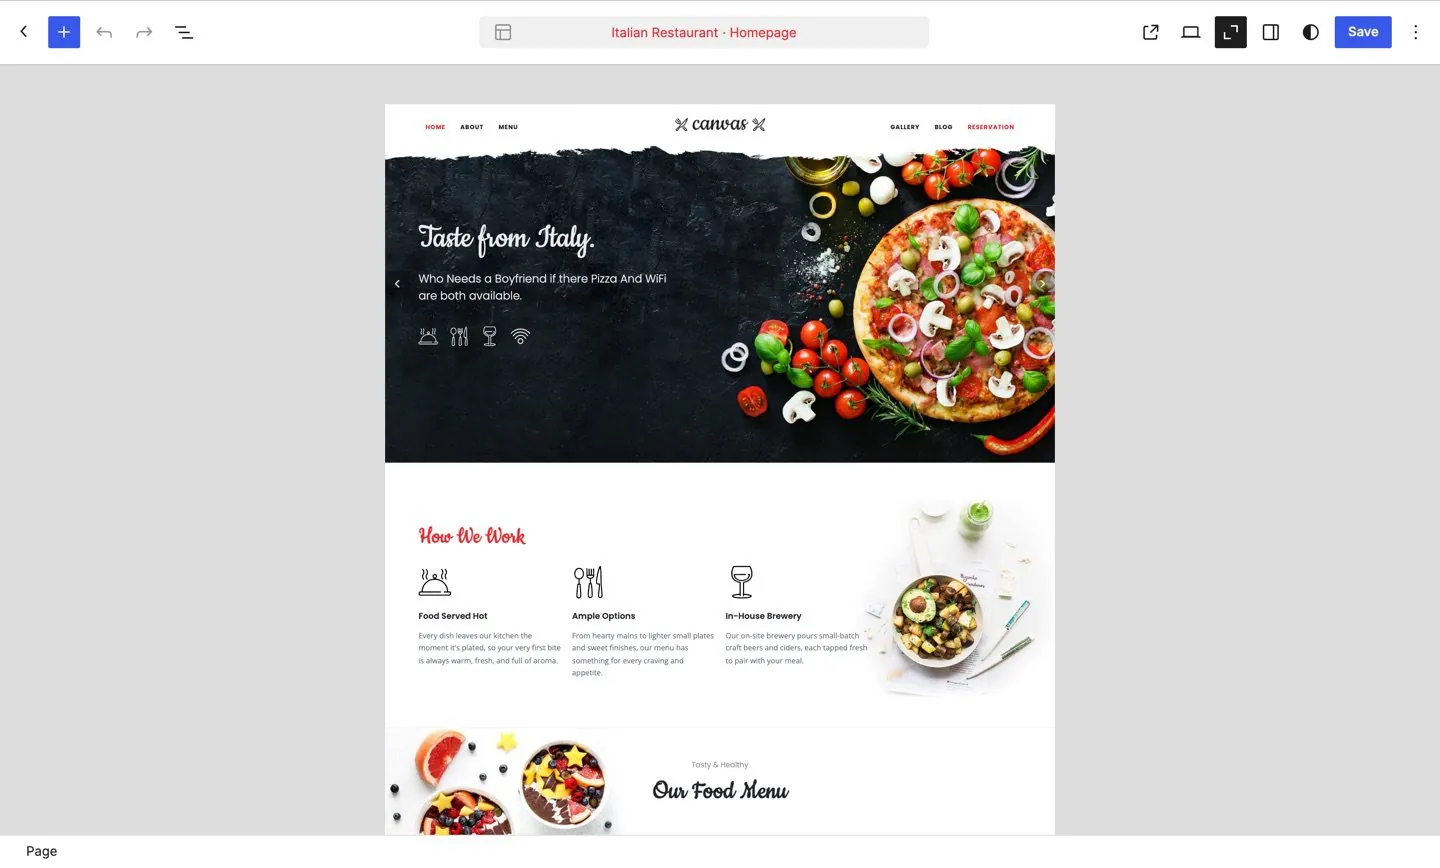
Open the home page from Pages. The editor draws the header, the slider, the page title band and the footer around your content the way a diner will see them, so you write the welcome line with the real page around it.
Click, type, replace
Every heading, paragraph and picture on the page is a block. Click one to type over it, or choose Replace on an image to pick one of your own photographs. The panel on the right holds whatever else that block understands, from its colours to its link.
Say the specific thing
The demo copy is deliberately generic, which makes it easy to spot and easy to beat. Replace "Authentic Italian cuisine" with the thing only you can say: the region the recipes come from, the name of the person at the pass, the wood in the oven, the hour the bread comes out. A diner choosing between two restaurants reads for detail, not adjectives.
When a section does not fit your restaurant, delete it and put a pattern in its place. There are 183 of them to choose from, each arriving as ordinary blocks, ready to rearrange.
Step 6: Take reservations with a form
The demo ships a working form. A form in Canvas is a record built from blocks: a Form block holds the fields, a Form Field block defines each one, a Form Submit Button sends it, and a Form Embed block drops the finished form into any page.
The fields a booking needs
- Date and Time fields, with an earliest and a latest time. Set the earliest to the hour you open and the latest to your final sitting, and set the interval to fifteen or thirty minutes so you do not receive a booking for 19:07.
- A Number field for the party size, with a minimum and a maximum that match your largest table.
- Text and Telephone fields for the name and phone number, and an Email field for the confirmation.
- A Textarea for allergies, high chairs and the anniversary you would otherwise miss.
- A Consent checkbox if you plan to email guests later, and a Honeypot field, which is an invisible trap that quietly catches most spam without troubling a human.
Where the requests go
The demo's reservation form arrives with fields for a name, a phone number and an email address, a date picker that greys out days in the past, a time menu and a party size menu. It saves every request to a table on your own site, listed under Submissions in the WordPress admin. It does not email anybody yet: open the form, switch on Send Email Notification in its Actions tab, and set the address to one somebody reads during service. Then book yourself a table and check the message lands.
Treat each entry as a request you confirm. The form takes the booking down; it does not count covers or hold a table. If you need live availability, a dedicated booking system is the tool for it, and the form's webhook action can pass each request along. Set a retention period on the form too, so guests' phone numbers are cleared out on a schedule you choose.
75 of the 80 demos ship at least one working form, so most of the time you are editing a form and the wiring is done.
Step 7: Set the header, opening hours and contact details
The header is where a hungry visitor looks for the phone number, and the footer is where they look for the address. Both are records made of blocks in Canvas, edited the same way as a page.
The header
A header record holds zones, and a zone is a cell in the header row. Put the logo in the first, the navigation in the middle, and in the last one a Header Icon Link with your phone number beside a Header Button that says Book a table. A Header Info block carries the address or the hours when there is room for them.
Add a top bar above the header for today's hours or a holiday closure. A top bar is its own record, so the message changes without opening the header at all.
Opening hours in the footer
The footer takes a Footer Contacts block for the address and the phone number, and a column of hours beside it. Write the hours as text a person reads, then keep them accurate, because nothing annoys a visitor more than arriving at a closed door.
Both the header and the footer have a site-wide default and a per page override, so a private dining landing page can carry a transparent header over a photograph while the rest of the site keeps its own.
Step 8: Check it, then open
Work through this list before you point anybody at the site. It is short, and every item on it has embarrassed somebody.
- Send a real test booking from your phone, with the restaurant wifi switched off, and confirm the notification arrives.
- Read every page on a phone. Most people looking for dinner tonight are standing up.
- Check the address, the phone number and the hours on every page that repeats them, including the footer.
- Write alt text for the photographs. It helps people using a screen reader and it is the only description a search engine gets of your dining room.
- Look at the SEO screen. Canvas derives titles, descriptions, sharing cards and structured data from your live content, so the work here is making the content specific, not filling in a second set of boxes.
- Turn on the performance switches you need. There are 35 optimisations, each reversible, and each one loads less of what your pages never use.
Then publish, put the address in the places people search, and go back to running the restaurant. The site is now a set of records you edit when the menu changes, not a project.
Where to go from here
Two guides for the work that follows a launch, and the demo behind this one.
Common questions
The full FAQ answers the rest, and the documentation covers every setting in detail.
Do I need a plugin to take reservations?
No. The form is built from Canvas blocks and its entries are stored in a table on your own website, listed in the WordPress admin. You add a plugin only if you want to push bookings into a third-party booking system that manages tables and covers.
Can I use my own photographs?
Yes, and you should. Every demo image lands in your media library as an ordinary attachment, so replacing one is the same job as replacing any image in WordPress. Keep the shape close to the original so the layout does not shift, and write a short description in the alt text field while you are there.
What if I do not like the restaurant demo?
Import a different one. All 80 demos are included with every plan, and each import is tracked separately, so you roll one back and try another. A second demo can also come in for its pages alone, leaving the design you have.
Will the menu prices show up in Google?
Canvas builds structured data from what is on the page at render time, across 16 schema types that include opening hours, offers and reviews. What a search engine chooses to display is its own decision, but the markup is there without a second SEO plugin.
Build your next website with Canvas
Beginner, freelancer or agency, you get the same blocks, the same demos and the same support. Start with one site and add more when you need them.