

Build a real estate website with WordPress
A property website has four jobs: show the stock, let a buyer narrow it down, answer the questions a listing raises and collect the enquiry. This guide does all four, starting from an empty WordPress install and finishing with a listing page a buyer can filter. There is no MLS or IDX feed and no CRM in the theme, so this is for an agent, a small brokerage or a developer listing its own stock.
Step 1: Get WordPress ready
Settle three settings before the first listing goes in, because each one surfaces in places that are awkward to fix later.
- Site title and tagline. Settings, then General. The agency's name goes in the title, and the tagline says what you sell and where, such as family homes in one district. Search results and shared links both quote these lines.
- Permalinks. Settings, then Permalinks, then Post name. Every property then gets a readable address, which matters because property links get forwarded between partners, parents and friends.
- Timezone. On the General screen again. Enquiries are timestamped against it, and the timestamp is how you know which buyer asked first.
Listings are photograph-heavy: every property brings a gallery, and a low PHP memory limit is the usual reason an import stalls in the middle of its media. Ask your host what the limit is now. The version requirements and the backup routine are the same for every Canvas site, so they live in the import guide.
Versions, backups and hosting headroom
An enquiry that sits unread for a day can cost you the buyer. WordPress passes its mail to your server unless you say otherwise, and many hosts drop it quietly, so connect an email delivery service or an SMTP plugin before any listing goes live.
Step 2: Install Canvas and run the setup wizard
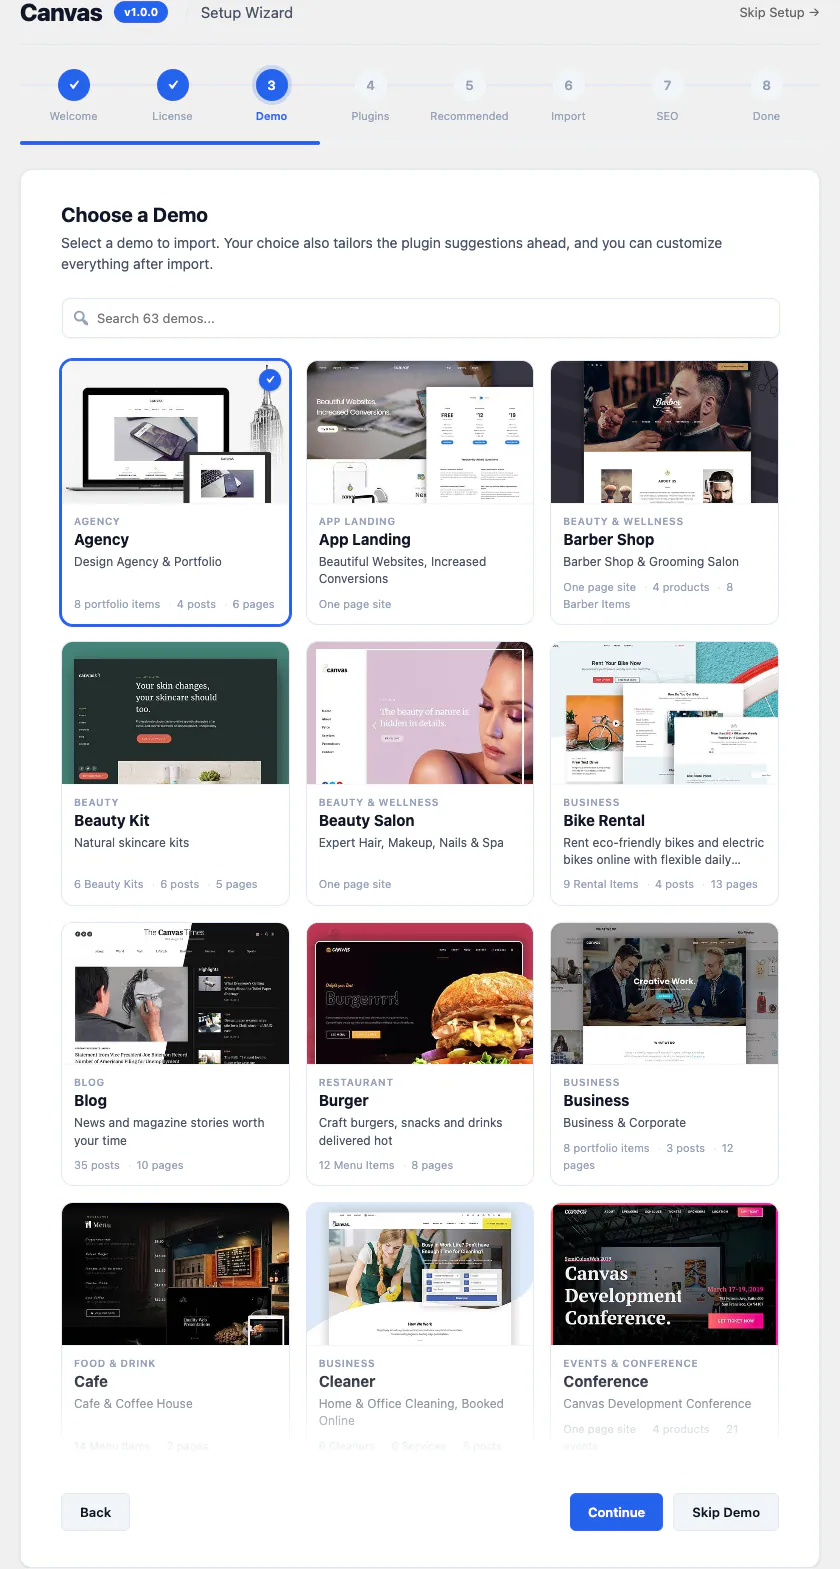
Upload the theme zip from your dashboard (Appearance, Themes, Add New, Upload Theme) and the setup wizard starts the moment you activate it. Paste your licence key when it asks; the key is what allows the wizard to fetch the Real Estate package. At the demo step, search for Real Estate. The design uses no third-party plugin, so the plugins step has nothing to install and moves you on.
The wizard also names the site at the end. If you imported site-wide, that step is filled in for you, and every step can be skipped and picked up later from the Canvas menu.
Step 3: Import the Real Estate demo
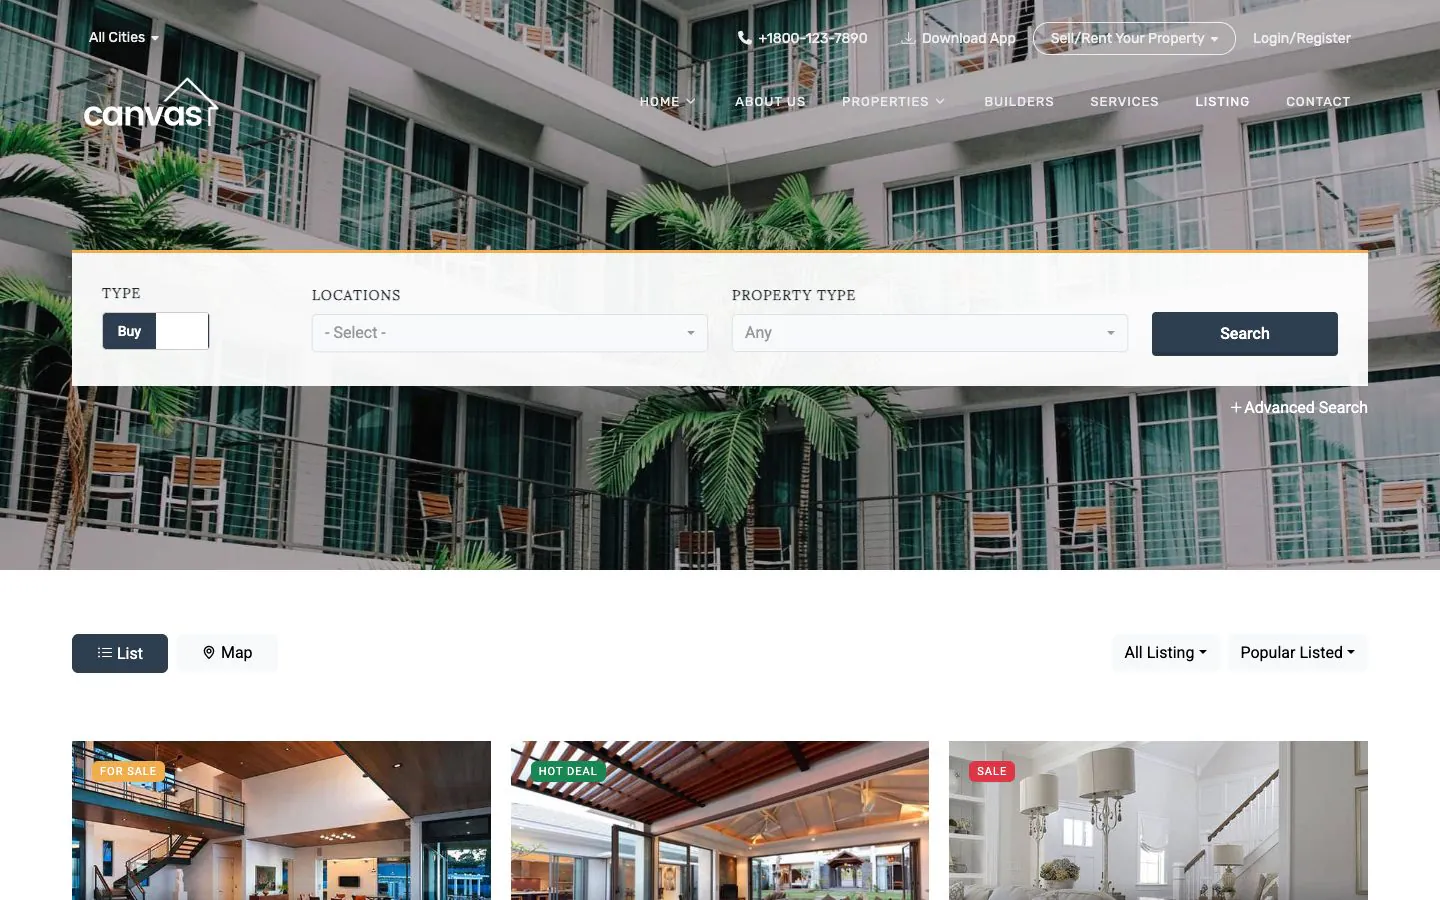
Use the live preview the way a buyer would before you import anything: run a search, narrow it by price, open a property. It is the Real Estate demo itself, running on the theme you are about to install.
Which scope
A new agency site should take the whole design. Import site-wide and the demo's Theme Options, fonts, colours and menus become yours. If you already run a site and want the listings machinery without its look, import into the existing website: the pages and property records arrive and your own design stays as it is.
What you get
- 9 pages: three home page designs, the listing page, services, builders, about, contact and the blog
- 10 properties, each one a record in the Properties content type, with its price, beds, baths, area, gallery and map
- Property types for villas, apartments, offices, estates, commercial and residential, and locations to file each property under
- 5 blog posts, so the market news section is not empty on day one
- 10 forms: four property searches, a contact form, two quick quote forms, a reserve form and a subscribe form
- A header, a footer, a top bar, a side panel and four hero designs, all of them editable records
Changed your mind about the design? Canvas, then Demo Import, rolls this import back, property records and all, and puts your earlier settings back.
Step 4: Replace the demo words and pictures
Open the home page you are keeping from Pages. The editor shows it inside the real header, search band and footer, so the page you edit is the page a buyer lands on.
Pick one of the three home designs
The demo ships three: a standard home, a slider home and a buy and rent home whose search offers the two as tabs. Set the one you want as your front page in Settings, then Reading, and delete the other two once you have decided. There is no point maintaining three home pages.
Words first, then photographs
Type straight over any heading or paragraph. Then work through the pictures: select one, replace it from your media library, and keep your exterior shots close to the demo's proportions so the hero does not jump. Colours, links and sizes live in the settings panel each block opens on the right.
Replace the demo copy with the thing only you can say: the streets you actually work, how long you have been on them, what your fee covers. A buyer choosing between two agents reads for detail. If a section does not suit you, delete it and insert a pattern in its place; Canvas ships 183 patterns and 258 blocks, and a pattern arrives as ordinary blocks you rearrange like any others.
Step 5: Enter your properties as records
This is the step that decides whether the site is maintainable. A property in the Real Estate demo is not a page you lay out. It is a record in a Properties content type, listed in the admin like posts, and every card, every listing row and the property's own page read from it.
What one record holds
- The price and its period, written the way you quote it: $1.2m with Leasehold, or $799 with per month.
- A price and an area as plain numbers beside them. These are the values the search ranges compare against, so a record with them left empty stays out of a price or area filter while still appearing in an unfiltered search.
- A badge, such as For Sale, Long Term Rental or Hot Deal. It is a field on the record, so nobody has to redraw a graphic.
- Bedrooms, bathrooms, floor area and location, which is what a buyer scans a card for.
- A gallery, a video link and a map embed, plus a stat strip, a specification list and an amenity list you write as one item per line.
- The agent shown on the listing, with a name, a role and a photograph.
File every property twice
Give each record a property type and a location. Those two taxonomies are what the search dropdowns are built from and what the listing block filters on, so a property filed under neither is a property nobody can find. The demo starts you with villas, apartments, offices, estates, commercial and residential, and four locations; rename them to your own areas and add more.
Work through the 10 demo records once. Edit the first one to learn the fields, then delete the rest and add yours. The first few take a while; after that it is data entry, and the layout of a property page never needs another thought.
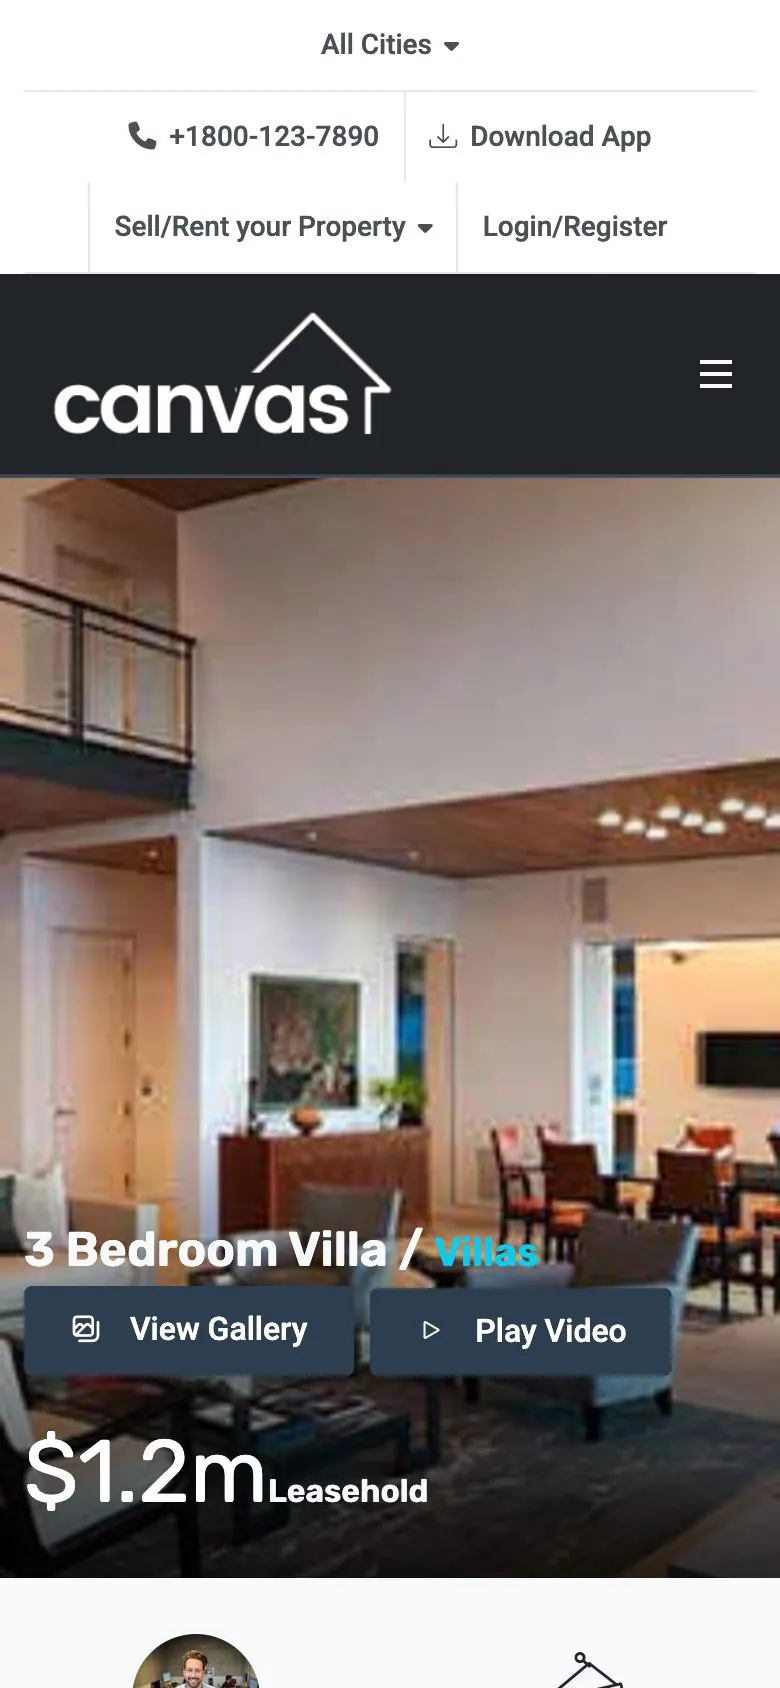
The property page is built from blocks that each draw one piece of the record: the hero banner, the stat strip, the specification table, the amenity list, the map embed, the video embed and a row of similar properties. Rearrange them, or drop one you do not need.
Step 6: Make the search filter your listings
The search band over the hero is a Canvas Form set to search mode and pointed at the listing page. It does not query a board or a third party. It narrows the properties you published.
The criteria it sends
- Buy or rent, as a switch with your own labels on the two sides.
- Location, a searchable dropdown that can take more than one at a time.
- Property type, with a leading option labelled Any that means no filter.
- Bedrooms and bathrooms, as a minimum.
- A price range and a floor area range, compared against the plain numbers on each record.
The location and property type dropdowns read their terms live, so a location you add to a record next month appears in the search on its own, with no edit to the form.
Where the results land
The form sends the criteria to the listing page as an ordinary web request, and the listing block there reads them and narrows its query. Because the criteria travel in the address, a filtered listing is a link: you can send a buyer three bedroom villas in one area, and they can bookmark it. Turn the filter off on any listing block that should always show everything, such as a featured row on the home page.
The demo puts a search in the hero of all three home designs and at the top of the listing page, with buy and rent as tabs on one of them. Edit whichever you keep and delete the rest, the same as the home pages.
Step 7: Take enquiries with a form
A listing that nobody can respond to is a brochure. The demo brings its enquiry forms wired up, each one a form record you place on any page with the Form Embed block.
The three that arrive with the demo
- The contact form, on the contact page, for the general enquiry.
- Two quick quote forms, a dark one and a light one, for the short valuation request you drop beside a listing.
- The reserve form, for a viewing or a holding request on a specific property.
Set them up once
All three save each enquiry and email it. Open each form, change the notification address to one somebody actually reads, and give the subject line a word you can filter on, such as the property type.
Every enquiry is also kept on your own site, under Submissions in the WordPress admin, so a full inbox never swallows a lead. Set a retention period and old entries are deleted or anonymised on schedule, which settles how long a buyer's name and number stay on file. A CRM belongs outside the theme: the form's webhook action passes each enquiry on to the one you use, and Canvas does not pretend to be one.
Step 8: Set the header, contact details and footer
A buyer who is ready to talk looks to the top of the page for a number and to the bottom for an address. In Canvas both ends of the page are records built from blocks, and you edit them the way you edit a page.
The header
Lay the header out in zones: the logo on the left, the navigation in the middle, and on the right a Header Button for the one thing you most want visitors to do, such as booking a valuation, next to a Header Icon Link that carries your phone number. The demo header runs transparent over the hero photograph and turns solid as the page scrolls; both are settings on the record, and a page can override the site-wide header.
A top bar sits above it and a side panel waits behind it. The top bar is a record of its own, which makes it the place for this weekend's open house.
The footer and the details
The office address and phone number sit in a Footer Contacts block. Hunt down every copy of the demo's phone number and replace it: the contact page, the footer and each form's notification settings. A lead that rings a demo number is a lead you never hear about.
Step 9: Check it, then publish
Before the first buyer sees the site, go through these checks. None of them takes long.
- Run your own search. Pick a location, a type and a price range you know has a match, then one you know has none, and confirm both behave.
- Open three property pages and check the price, the beds, the baths and the area against your own paperwork.
- Send a real test enquiry from your phone on mobile data, then look for both the email and the stored entry.
- Look at it on a phone. Property browsing happens on sofas, on trains and on the pavement outside the house.
- Describe the photographs. Alt text is read aloud by screen readers, and to a search engine it is the only account of what a room looks like.
- Check the SEO screen. Titles, descriptions, sharing cards and structured data across 16 schema types come from the listings themselves, so a specific listing makes a specific search result.
- Choose your performance switches. Canvas has 35 optimisations; each can be turned off again, and each stops a page loading something it does not use.
Then publish. From here the site is a set of property records you update as stock comes on and goes under offer, not a project you rebuild.
Where to go from here
Two guides that begin from the same place, and the demo behind this one.
Common questions
The full FAQ answers the rest, and the documentation covers every setting in detail.
Does this pull listings from an MLS or IDX feed?
No, and neither does it include a CRM. Canvas has no MLS or IDX integration and no lead pipeline: it lists the properties you publish on your own website, and it keeps the enquiries those listings produce. A syndicated feed, a lead pipeline and a viewing scheduler are plugin territory, and the Real Estate demo's forms can post to a webhook so a lead reaches the tool you already use. If a board feed is the whole point of your site, a specialist listings plugin is the right tool.
How do I add a property?
Properties, then Add New, the same as writing a post. The title is the property name, the featured image is the card photograph, and the fields below the editor carry the price and its period, the badge, the location, the bedrooms, the bathrooms, the floor area, the gallery, the stat strip, the specification list, the amenity list, the agent shown on the listing, a video link and a map embed. File it under a property type and a location and it appears in the listing, in the search and on its own page.
Does the property search really filter my own listings?
Yes. The search is a Canvas Form set to search mode, pointed at the Listing page, and the listing block on that page reads the criteria and narrows the query: buy or rent, location, property type, bedrooms, bathrooms, a price range and a floor area range. The criteria travel in the address, so a filtered listing can be linked, bookmarked and shared. Nothing is fetched from anywhere else.
Where do enquiries go?
Into a table on your own website, listed in the WordPress admin, and by email to the address you set on the form. The contact, quick quote and reserve forms in the demo are all set to both, so an enquiry survives a full inbox. Each one also carries a honeypot field, an invisible trap that catches most spam without troubling a person.
The demo ships 10 properties. What if I have two hundred?
Add them. The demo's 10 properties are a worked example, not a limit, and the listing block sets how many appear per page, which property type to draw from and the order. The location and property type dropdowns in the search read their terms live, so a location you add next month appears in the search with no edit to the form.
Build your next website with Canvas
Beginner, freelancer or agency, you get the same blocks, the same demos and the same support. Start with one site and add more when you need them.